

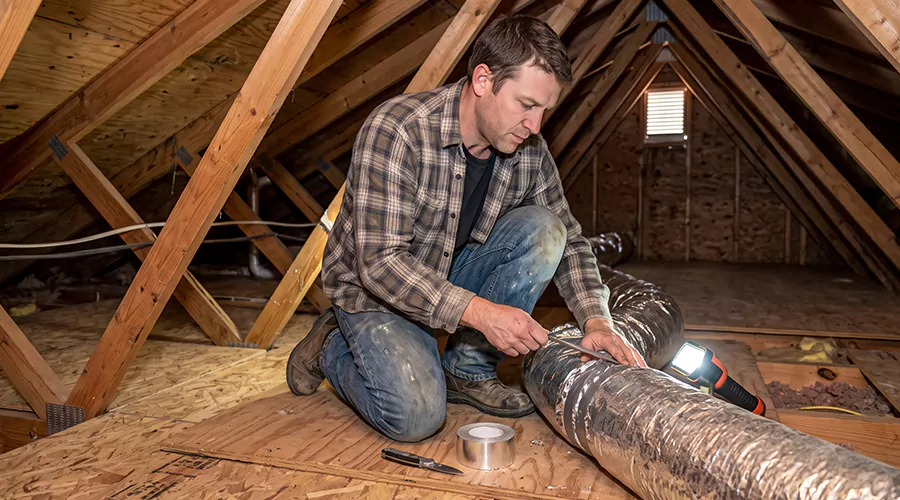
You can repair ductwork in the attic by locating damaged sections, securing loose connections and sealing air leaks with approved HVAC materials. Torn flexible ducts may require replacement, while sound metal ducts can often be repaired at their joints. In 2026, professional attic ductwork repairs typically cost $200 to $1,500, depending on the damage and accessibility.
Attic ductwork is exposed to conditions that can cause problems over time. High summer temperatures increase heat gain through poorly insulated ducts, while physical damage can create air leaks or restrictions. Flexible ducts may also become disconnected when their supports fail or the material is disturbed during maintenance.
The correct repair depends on whether the problem involves an air leak or damaged insulation. A loose connection may be repairable without replacing the branch, but a severely crushed duct cannot be restored through sealing alone. Identifying the affected component helps prevent unnecessary repairs and improves the chances of a lasting solution.
What Causes Attic Ductwork to Become Damaged?
Attic ductwork commonly becomes damaged because of poor support and physical contact during maintenance activities. Improperly sealed connections can also deteriorate over time. In unconditioned attics, damaged insulation exposes ducts to significant temperature differences that can worsen comfort problems and create condensation risks.
Poorly Supported Flexible Ducts
Flexible ducts require adequate support to maintain their intended shape. When straps are missing or incorrectly spaced, the duct may sag between its attachment points. Excessive sagging increases airflow resistance and places stress on the connections at each end.
A loose support can eventually allow the inner liner to pull away from a collar. Conditioned air may then escape into the attic instead of reaching the intended room. Restoring both the connection and support system is necessary to prevent the problem from returning.
Air Leaks at Duct Connections
Attic duct systems contain multiple joints where branches connect to supply trunks or register boots. These connections may leak when sealing materials deteriorate or the fittings separate. Even a relatively small opening can waste conditioned air when it releases cooling into the attic.
ENERGY STAR estimates that typical homes lose approximately 20% to 30% of the air moving through their duct systems because of leaks and poorly connected ducts. However, this is a general estimate rather than the measured leakage rate for every home. The actual effect depends on how many leaks exist and where they are located.
Damage During Attic Maintenance
Attic ducts can be damaged when people move stored objects or equipment around them. Flexible liners are particularly vulnerable to punctures and compression. Stepping on a duct or leaning against an unsupported section can also loosen a connection.
A damaged outer covering does not automatically mean the inner air passage has been punctured. However, exposed insulation may lose its protective barrier against moisture. Inspecting the affected layers helps determine which parts require repair.
Damaged Duct Insulation
Attic ducts require suitable insulation to reduce heat transfer between conditioned air and the surrounding attic. Torn insulation can allow cooled air to gain heat before reaching living spaces. Exposed cold surfaces may also collect condensation when humid air contacts them.
The problem becomes more serious when insulation remains damp. Water can damage the protective covering and affect nearby building materials. Restoring insulation without correcting moisture conditions may result in repeated damage.
Pest Activity
Rodents and other pests can enter attic spaces and damage certain flexible duct materials. The outer protective jacket may be torn, while insulation can become contaminated by nesting activity. Significant damage may extend beyond what is visible from outside the duct.
Pest-related contamination should not be treated as ordinary household dust. Disturbing nesting material or droppings can create additional exposure concerns. The entry source must be addressed before damaged materials are replaced.
How Can You Tell if Attic Ductwork Needs Repair?
Attic duct problems often become noticeable when one or more rooms receive less conditioned air. A disconnected branch may cause a sudden loss of airflow, while a damaged insulation covering can reduce heating or cooling efficiency. However, similar symptoms may also result from equipment problems or blocked registers.
The strongest evidence comes from examining the physical condition of accessible ductwork. A visible separation or torn inner liner provides a clearer explanation than room temperature alone. Comparing several supply vents also helps identify which duct branch may be affected.
| Warning Sign | Possible Problem | What to Inspect |
|---|---|---|
| Weak airflow from one room | Disconnected or damaged branch | Supply duct connection |
| Visible tear in flexible duct | Damaged liner or outer jacket | Individual duct layers |
| Duct lying across attic floor | Missing or inadequate support | Hangers and routing |
| Air escaping around fitting | Duct connection leak | Joint and sealant |
| Crushed or sharply bent duct | Airflow restriction | Duct shape |
| Wet insulation | Condensation or water intrusion | Insulation and moisture source |
| Whistling at an exposed seam | Escaping air | Joint condition |
| Loose connection at register boot | Mechanical separation | Boot and branch fitting |
These signs should be evaluated together. A torn outer jacket may need insulation repair even when airflow remains normal. A disconnected inner liner requires an airtight connection repair because sealing only the jacket will not stop air leakage.
How to Inspect Attic Ductwork Safely?
Attic inspection should begin with safety because unfinished attic floors and extreme temperatures can create serious hazards. Many attics have only ceiling drywall between structural framing members. Stepping onto unsupported drywall can cause a fall through the ceiling into the room below.
Inspecting from an existing walkway or another stable approved surface is preferable to moving through unfinished areas. Avoid entering the attic when temperatures are extreme or visibility is poor. Unfamiliar insulation materials also require caution because some older products may contain asbestos.
A basic inspection can follow these steps:
- Turn off the HVAC system before touching duct materials.
- Identify the rooms with weak or uneven airflow.
- Locate safely visible branches serving the affected areas.
- Check exposed connections for separation or loose coverings.
- Look for severe bends and unsupported flexible sections.
- Examine accessible insulation for dampness or tears.
- Photograph damaged areas without pulling materials apart.
- Record which sections appear to need further attention.
This inspection can identify obvious problems without dismantling the duct system. However, concealed damage may not be visible from a safe access point. Avoid cutting into ducts or disturbing potentially hazardous insulation simply to confirm a suspected leak.
What Materials Are Used for Attic Duct Repairs?
Attic duct repairs require materials that are compatible with the duct construction and operating conditions. Mastic and approved metal-backed foil tape are commonly used for air sealing. Mechanical fasteners or clamps secure loose fittings, while insulation restores thermal protection around the repaired section.
| Repair Material | Main Purpose |
|---|---|
| HVAC-rated mastic | Seal suitable duct joints and seams |
| Approved foil tape | Seal compatible prepared connections |
| Mechanical fasteners | Secure rigid duct fittings |
| Approved clamps or draw bands | Attach flexible inner liners to collars |
| Replacement flexible duct | Restore severely damaged duct sections |
| Suitable duct insulation | Reduce heat transfer |
| Compatible vapor-barrier tape | Seal insulation jacket seams |
| Broad support straps | Prevent sagging and compression |
Ordinary cloth-backed duct tape should not be used for permanent HVAC duct sealing. Its adhesive can deteriorate over time and may separate from the duct surface. Proper mechanical attachment is equally important because sealant cannot support the weight of a disconnected duct.
For attic insulation, ENERGY STAR recommends duct insulation with an R-value of at least R-6 for many unconditioned-space applications. Some local codes require higher ratings, such as R-8 for certain ducts. The required level should be confirmed before replacing damaged material.
How to Repair Leaking Duct Connections in the Attic?
A leaking attic duct connection can often be repaired when the duct material remains sound. The repair involves restoring the fitting and applying an approved air seal. The joint must be secure before the exterior insulation is replaced because a loose connection may fail again when the blower operates.
Step 1. Identify the Leaking Connection
Inspect the affected joint and determine whether it has a narrow gap or has separated completely. A seam opening on rigid metal may need sealing, while a detached flexible branch requires mechanical reconnection. Document the original condition before making changes.
Do not assume that visible damage to the outer insulation jacket identifies the actual air leak. Flexible ducts contain a separate inner liner that carries the airflow. The repair must address the correct layer.
Step 2. Secure the Duct Joint
A loose connection must be reattached with fasteners or clamps suitable for its construction. Rigid duct fittings and flexible collars use different attachment methods. Follow the manufacturer's requirements rather than relying on sealing tape alone.
The connection should remain stable without being pulled by the weight of the duct. If damaged support caused the separation, the support arrangement must also be corrected. Otherwise, the joint may come apart after normal operation resumes.
Step 3. Seal the Air Passage
Apply approved HVAC mastic or compatible foil tape according to the product's instructions. The sealant should cover the intended opening and bond to both sides of the joint. Wider gaps may require reinforcement or replacement of a damaged fitting.
Surface preparation is important because loose dust can prevent adhesion. Avoid applying new tape over deteriorating old adhesive. The finished seal should remain continuous without interfering with internal airflow controls.
Step 4. Restore the Insulation
After sealing, restore insulation over the repaired connection. The insulating layer should remain thick enough to provide its intended thermal resistance. Compressing the material with overly tight straps can reduce effectiveness.
The protective outer covering must also be sealed according to the insulation manufacturer's requirements. Gaps can allow humid air to reach colder surfaces and produce condensation. Any wet or contaminated insulation should be evaluated for replacement before the covering is closed.
Step 5. Check the Completed Repair
Allow the sealing material to cure according to its instructions before returning the HVAC system to normal use. Inspect the connection for movement and confirm that its supports remain secure. An accessible supply leak should no longer release a noticeable stream of air from the repaired joint.
A simple observation cannot measure overall duct leakage. Additional testing may be useful when several branches have been repaired or comfort problems persist. The finished work should restore airtightness without creating new airflow restrictions.
How Do You Repair Damaged Flexible Ducts in an Attic?
Flexible ducts are common in residential attics because they can connect rigid supply trunks to ceiling registers. Repair depends on whether the damage affects the inner liner or surrounding insulation. A torn liner can leak conditioned air, while a damaged protective jacket may mainly affect insulation performance.
A sound flexible liner that has disconnected from a collar may be reattached using the approved method. The connection normally requires mechanical fastening and suitable sealing. The exterior insulation and protective jacket are then restored around the fitting.
If the duct has been severely crushed or torn across a large area, replacing the affected section is often more reliable than patching it. Replacement material must match the required duct size and maintain a smooth airflow path. Long unsupported runs and sharp bends should be avoided because they increase resistance.
The support system is part of the repair. General flexible duct guidance calls for supports no more than four feet apart and limits sagging to approximately one-half inch per foot between supports. Manufacturer instructions and applicable building requirements take precedence.
How Do You Fix Damaged Attic Duct Insulation?
Damaged attic duct insulation should be restored only after checking that the underlying duct is sound and dry. The repair may involve replacing missing fiberglass insulation or sealing a compatible outer jacket. When moisture has saturated the insulation, replacement may be necessary instead of simple taping.
Begin by identifying the condition of the existing material. A small tear in a dry foil-faced covering is different from insulation that has become wet after a roof leak. Do not wrap new material over existing water damage because moisture may remain trapped near the duct.
For a sound rigid duct, suitable insulation can be restored around the affected section after air leaks are sealed. The exterior vapor-retarding layer should remain continuous, particularly around fittings and elbows. Gaps can allow humid attic air to reach cold surfaces during cooling.
The insulation repair should also preserve normal duct support. Overly tight straps can compress insulation or deform flexible ducts. A complete repair protects the air passage while maintaining the intended thermal resistance.
When Should Attic Ductwork Be Replaced Instead of Repaired?
Replacement is generally more appropriate when duct material can no longer support a reliable repair. Severely crushed flexible ducts and extensive liner tears are common examples. Localized sound connections can often be repaired without disturbing the rest of the system.
| Duct Condition | Recommended Approach | Reason |
|---|---|---|
| Small leak at sound metal seam | Seal | Duct remains structurally intact |
| Disconnected sound fitting | Reattach and seal | Connection can be restored |
| Minor dry outer-jacket tear | Repair covering | Inner liner remains usable |
| Large flexible liner tear | Replace affected section | Material may not support reliable patch |
| Permanently crushed flexible duct | Replace | Airflow passage remains restricted |
| Wet or moldy insulation | Replace affected material | Porous contamination may remain |
| Extensive rust on metal duct | Evaluate replacement | Metal may no longer be structurally sound |
An attic may contain both rigid metal trunks and flexible branches. The need to replace one damaged branch does not mean the entire system is defective. Replacement should address the actual damaged sections while preserving the designed airflow distribution.
How Much Does Attic Ductwork Repair Cost in 2026?
Professional attic duct repairs typically cost $200 to $1,500 in the United States during 2026. Small accessible repairs may fall near the lower end, while extensive damage involving flexible branches or insulation can cost more. Difficulty reaching a section also affects the labor required.
| Repair Type | Estimated 2026 U.S. Cost |
|---|---|
| Attic ductwork repair overall | $200 to $1,500 |
| Repairing a leaking duct joint | $375 to $700 |
| Flexible duct repair | $100 to $800 |
| Insulated flexible duct repair | $200 to $1,200 |
| Localized condensation repair | $200 to $900 |
| Severe duct damage or collapse | $150 to $2,000 |
These ranges represent different project categories and should not be added together automatically. A flexible duct repair may already include reconnecting the branch and restoring its insulation. The actual estimate should identify how much material needs attention and whether testing is included.
A project requiring new attic access or repairs to surrounding building materials can exceed ordinary duct repair costs. Replacing several branches is also a different scope from sealing one exposed joint. Comparing estimates based on the same work description helps clarify these differences.
Can Attic Duct Repairs Improve Cooling and Heating?
Proper duct repairs can improve comfort when conditioned air has been escaping into the attic. A disconnected supply branch may release much of its airflow before it reaches the room. Restoring that connection allows more air to follow the intended path.
Sealing leaks also reduces unwanted air exchange between the duct system and unconditioned attic spaces. Proper insulation helps limit heat gain during cooling and heat loss during heating. Both improvements can reduce the amount of work required from the HVAC equipment.
However, duct repair does not correct every comfort problem. A poorly balanced system or a dirty HVAC filter can also produce weak airflow. Measurements may be needed when temperature differences remain after physical damage is corrected.
When Should You Call an HVAC Professional?
Professional repair is appropriate when attic ducts are severely damaged or cannot be reached safely. Disconnected branches and extensive insulation damage may require more involved work than a simple surface seal. Qualified technicians can also test airflow after repairs to determine whether the affected rooms receive appropriate conditioned air.
An HVAC technician can inspect accessible connections and identify damaged flexible liners that require replacement. When extensive duct sealing is performed, the system may need additional airflow or pressure testing. This is particularly important in homes with fuel-burning appliances because changing duct pressures can affect combustion venting.
Unfamiliar attic insulation also deserves caution. Some older materials may contain asbestos and should not be disturbed without appropriate identification. A repair should address the HVAC problem without creating unnecessary hazards in the surrounding attic.
How Can You Prevent Attic Ductwork Damage?
Preventing attic duct damage requires protecting exposed materials and maintaining suitable support. Regular visual checks can reveal disconnected fittings or insulation problems before they cause major comfort issues. Avoiding unnecessary contact with ducts also reduces the risk of accidental punctures.
Protect Ducts During Attic Work
Keep tools and stored materials away from flexible ducts. Do not step on ducts or use them as support while moving through the attic. Inspect nearby branches after renovation or maintenance work because accidental contact can loosen their connections.
Maintain Proper Supports
Check that flexible ducts remain supported without excessive sagging. Replace damaged straps and correct sharp bends that restrict the air passage. Broad supports help protect the liner and insulation from compression.
Monitor Insulation and Moisture
Inspect safely visible insulation for tears or damp patches during seasonal maintenance. Condensation can develop when humid attic air contacts exposed cold duct surfaces. Correct insulation defects and water problems before the materials become extensively damaged.
Watch for Changes in Room Airflow
Compare airflow at nearby supply registers when one room suddenly becomes uncomfortable. A noticeable change following attic maintenance may indicate a disturbed duct connection. Checking the accessible branch early can help identify a small problem before it becomes a complete disconnection.
Conclusion
Repairing ductwork in the attic requires identifying damaged connections and restoring the air passage before sealing and insulating the affected area. Small leaks may be repairable, while severely damaged flexible ducts often need replacement. Safe attic access is as important as selecting the correct repair material. Professional evaluation may be necessary for concealed or extensive problems. This week, inspect safely visible attic ducts for loose connections and damaged insulation.